Let’s explore the world of Non-Destructive Testing (NDT) with Dye Penetrant Testing (PT), a technique that originated in the late 1800s within the railway industry. Imagine a method so sensitive it can reveal the smallest surface cracks using just a dyed liquid and careful observation. Dye Penetrant Testing is an excellent tool for beginners because it’s simple yet highly effective at detecting surface-breaking flaws on various non-porous materials.
What is Dye Penetrant Testing?
Dye Penetrant Testing is a traditional NDT method used to identify cracks, pores, and other surface-breaking discontinuities. It works on metals, plastics, ceramics, and many other non-porous materials. The process involves applying a liquid dye to the surface, allowing it to seep into any flaws, and then drawing the dye back out with a developer to create visible indications. It’s similar to detecting a leak by applying dye and observing where it appears.
How Dye Penetrant Testing Works
Here’s a step-by-step overview of the PT process:
- Surface Preparation: Start with a clean surface. Dirt, oil, or paint can prevent the dye from penetrating cracks, so the area must be thoroughly cleaned.
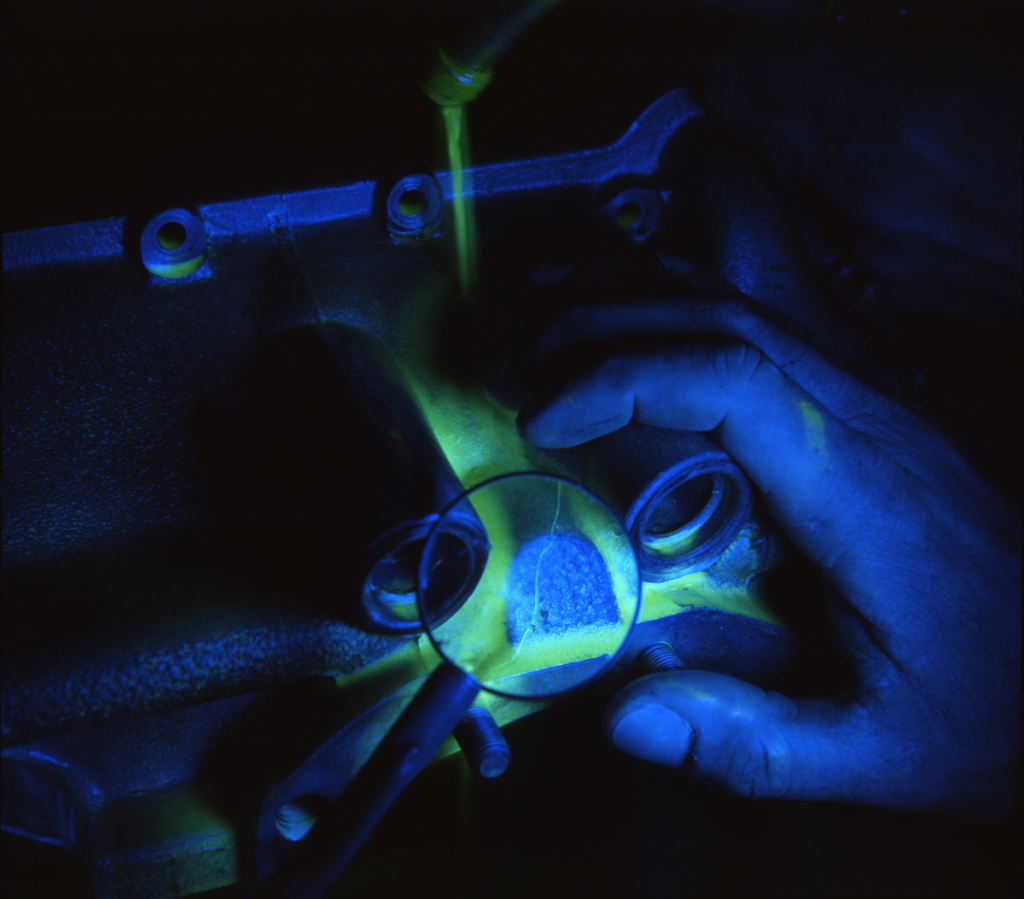
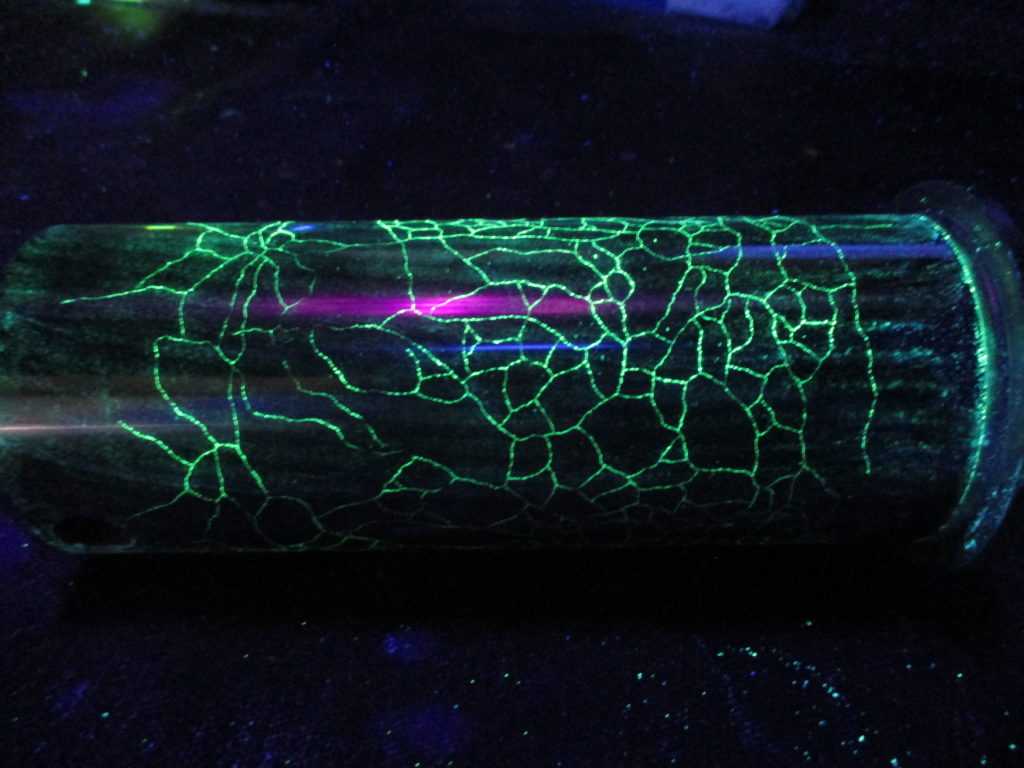
- Applying the Penetrant: Once the surface is ready, apply the dye penetrant. This liquid seeks out every crack, pit, or pore and seeps into it. Penetrants come in different types, such as fluorescent for UV light and visible red dyes for easy observation in daylight.
- Dwell Time: Allow time for the penetrant to settle into the cracks. Depending on the material and flaw size, dwell time can range from a few minutes to over half an hour.
- Removing the Excess Penetrant: After the dwell time, remove the excess penetrant from the surface while leaving the dye inside the cracks. The removal method depends on the penetrant type: some are water-washable, while others require solvents or emulsifiers.
- Applying the Developer: The developer helps reveal the flaws by drawing the penetrant out of the cracks and spreading it on the surface, making flaws visible as lines or spots.
- Inspecting for Flaws: Finally, inspect the surface. Under UV light for fluorescent penetrants or normal light for visible dyes, flaws appear as dark lines or spots against the white developer.
Types of Penetrants and Developers
Not all penetrants and developers are the same. Here’s a quick overview:
- Penetrant Types: Visible dyes (red for normal light) and fluorescent dyes (glow under UV light). Dual-purpose penetrants offer both options for different lighting conditions.
- Removal Methods: Penetrants can be removed with water, solvents, or an emulsifier, depending on the surface and penetrant type.
- Sensitivity Levels: Ranging from ultra-low to ultra-high, sensitivity levels determine the smallest flaw the penetrant can detect. Higher sensitivity allows for detecting finer cracks.
- Developer Forms: Available as dry powder, water-soluble, water-suspendible, and non-aqueous developers, each enhancing visibility in different ways during inspection.
Advantages and Considerations
Dye Penetrant Testing is popular for its simplicity, portability, and ability to reveal flaws in materials where other methods, like Magnetic Particle Testing, may not work. It’s widely used in the aviation, automotive, and manufacturing industries for routine inspections and quality control.
However, PT has its limitations. It only detects surface-breaking flaws, so subsurface cracks remain undetected. Additionally, it only works on non-porous materials. Proper preparation and cleaning are crucial, as any surface contaminants can affect the results.
Get in contact with us today to explore more learning options and courses: Contact us
